This blog will guide you step by step, from creating a new Google Cloud account to setting up billing and spinning up your first Virtual Machine.
Google Cloud Certification Bootcamp
Earn Associate Cloud Engineer and Professional Architect certifications at the same time with 34 hours of self-paced training and 2 hours of 1:1 coaching with a GCP expert.
See details![]()
Set up a Google Cloud account
1. Go to cloud.google.com and make sure you're signed in with the correct Gmail ID.
2. Click on Start Free from the top panel.
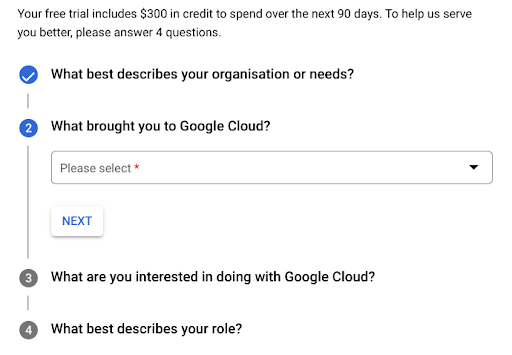
3. Select the region closest to you, your reason for creating a Google Cloud account, and accept all the terms and conditions.
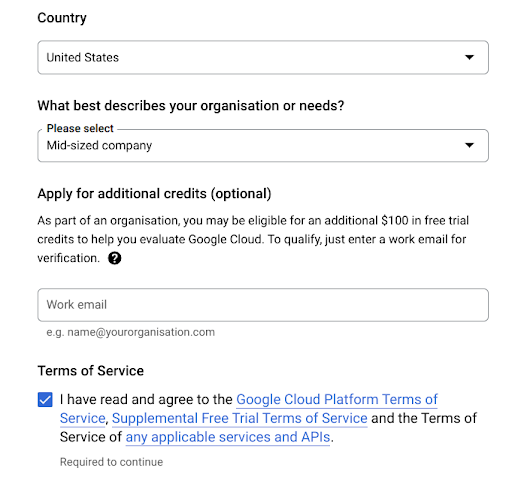
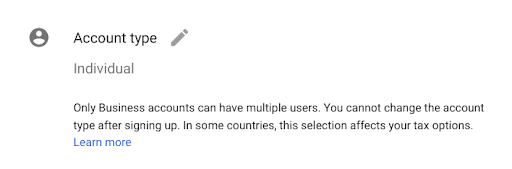
4. Select the Individual account type to claim $300 of free credits.
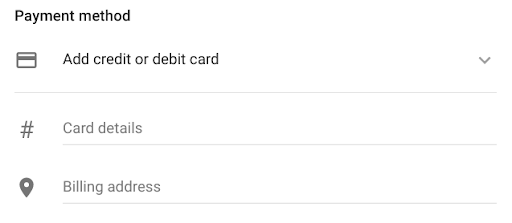
5. Enter all your payment details.
6. After providing all your details, a small fee will be deducted from the selected card. This will be refunded after a few minutes after verifying the authenticity of the payment option provided.
7. After your transaction is validated, you will land on the Google Cloud setup page confirming the activation of your free trial with $300 in credits for the next 90 days.
8. When the setup is done, you'll see the Google Cloud home page. Google Cloud will automatically create a default project for you with the name My First Project.
![]()
You can confirm this by looking at the top panel. Click on the My First Project tab and you will see a name and ID section. Note: Project ID in Google Cloud is globally unique. Two users can have the same project name but not the same project ID.

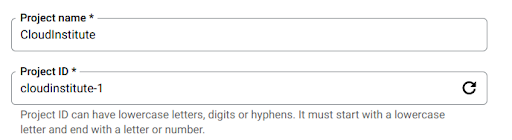
9. Now, create a new project with your preferred name and link it to the billing account. You'll only be able to link 10 projects in a single billing account. You can always send a ticket to the Google Cloud team requesting to increase quotas.
10. Click on the New Project button in the same window.
![]()
11. Not only can you enter your desired project name, you can also create your own custom project ID. Under the location tab, select no organization as you can’t create an organization node for a free tier account.
12. You can toggle between projects from the top panel. Switch to your most recently created project just by clicking on it.

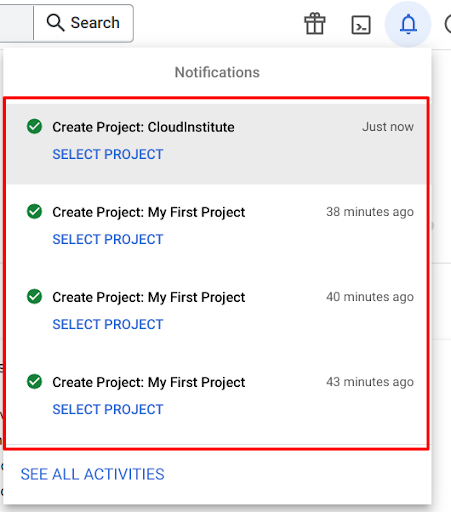
13. You can look at all the previous and current tasks in your Google Cloud account from the top panel itself by clicking on the bell icon.
Now you're done with the setup!
![]()
Where is my bill?
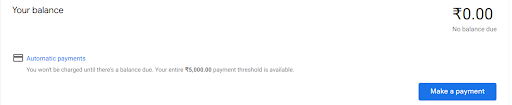
1. Google Cloud has simplified every task for you. Just search billing in the search bar located in the top panel and click on the payment overview option.

2. If you haven’t created any resources, then your current bill cycle should be at 0.
3. As you set up your new account, it is good practice to create budget alerts in case you forget to delete a particular resource. From the left panel, click on budgets and enter your details.

Now that billing is set up, let’s spin up your first Virtual Machine. Having a basic understanding of a service before running it always helps the process go smoother next time. Let’s explore some key areas of Compute Engine.
![]()
What is a Virtual Machine?
Virtual Machines (VMs) are essentially virtual computers. They fall under the Infrastructure-as-a-Services (IaaS) category, in which you lend a resource for set amount of time without needing to figure out the physical assembly of the components.
Under the hood, VMs are used in nearly every service. You can use VMs to deploy websites, databases, apply patches, perform backups, and more.
One major advantage of using VMs is the pay-as-you-go model, which gives you the flexibility to make changes to your configuration with no capital expenditure (CapEx). In addition to this benefit, Google Cloud offers sustained and committed discounts for most compute services.
Let's launch your VM
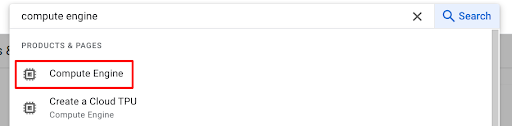
1. Search Compute Engine in the search bar and select the service.
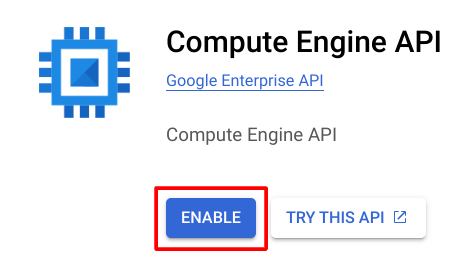
2. All Google Cloud services use APIs under the hood, and all APIs are disabled by default. Note: Enabling these APIs won’t incur any cost. Now enable the Compute Engine API. This process may take about two minutes to complete.
3. The most efficient approach to excel with a cloud vendor or product is to observe every spec of the platform. Notice all the options ranging from the Instance Template section in the left panel to the Show Info section in the rightmost panel.
Scroll over the top panel and click on Create Instance to create the VM.
![]()
4. The name of your virtual machine can only use lowercase letters, hyphens, and numbers. Note: No two virtual machines can have the same name.
5. Google Cloud offers many options to run your VMs. Let’s take a look at the regions category. Regions are a geographical segmentation of Google’s data centers. In turn, these regions are divided into availability zones, with each region having at least three zones. Zones ensure that machine failover can be performed in case of any maintenance or disaster. You can learn more about regions and zones by having a look at the Official Documentation of Google Cloud.
It’s a good practice to choose a zone that is close to your traffic or user footprint. Note: Once you choose the region & zone, you can’t change it.
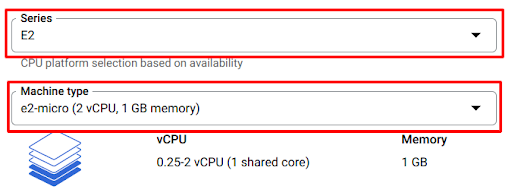
6. Next we’ll go over the machine configuration. In Google Cloud, the configuration is composed of two variables: CPU and RAM. You can choose from various machine families:
- General-purpose. This type is meant for a balanced workload, such as deploying a dynamic website.
- Compute-Optimized. This has more CPU compared to RAM and is best meant for workloads which require high processing power.
- Memory-Optimized. This has more RAM than CPU and is beneficial for running high memory-consumption tasks like maintaining databases.
- GPUs. This machine family is good for running rendering tasks where speed matters the most.

9. After choosing the family type, select the series of the virtual machine. Series are machines with predefined virtual central processing units (vCPUs) and RAM. Each series is further divided into machine types. Knowing the machine type can give you insight about the workload and processor. For example, n1-standard-1 is the name of a machine type where n1 is the series, standard is the type of workload, and 1 is the number of vCPUs.
You can even deploy containers on the machine, but for the sake of simplicity we will be deploying a static webpage on the VM.
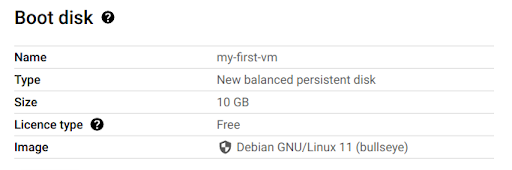
10. Google Cloud offers a range of options for the boot disk, from public images and custom images to snapshots and disks. Since this is your first VM, keep the default configurations for the boot disk.
11. Under Identity and API access, you can define the service account and the access scope for your machine. Service accounts are the accounts that simulate administrative tasks for any backend activity. With the creation of an account, Google Cloud creates two service accounts for you, namely the Compute Engine default service account and Google APIs service account. Access scopes are used when you want to restrict the access of your VM.

Note: All incoming traffic to your VPC is blocked by default. You can allow specific traffic by defining custom firewall rules. Simply check the HTTP and HTTPS checkboxes to allow the flow of respective traffic.
12. Under advanced options, you can define multiple parameters. You can explore the configuration of the networking option, which deals with the network (or VPC) in which your VM will be created, the network interfaces, and the type of IP address of your VM (External/Internal). You can also configure the disks tab, which is used to define extra disk space needed by the VM, and lastly the security tab, which defines the security aspect of the machine.
The most important tab is management, which deals with automation, startup, shutdown scripts, defining availability policies, and metadata for the VM. For deploying a web page, you need to install an Apache server and some other dependencies on the VM. Copy the code below and paste it in the automation tab, which will serve as a startup script for the virtual machine. This will ensure that the desired dependencies are installed each time the VM is spun up.
#!/bin/bash
apt update -y
apt install -y apache2
echo "My first VM is here!" > /var/www/html/index.html
The last option is Sole Tenancy, which ties your machine to a particular physical server.
13. The creation of the VM may take one to two minutes. Click on the SSH button located on the far right of the VM panel to get into the VM and deploy the web page.

14. Enter the sudo su - command to have root privileges, and change the directory using the cd/var/www/html command.
15. Now edit the index.html file using editors like vim or nano. Enter the command vim index.html or nano index.html to edit the file.
16. Copy and paste the code below, and enter :wq to exit the vim editor.
<html lang="en"><head> <title>My First Virtual Machine</title></head><body> <img src="https://www.cloudinstitute.io/pub/media/catalog/product/placeholder/stores/2/place-holder.png" alt="cloudinstitute" width="100px" height="100px"> <div style="background-color:#2a70ea ;"> Cloud Institute is committed to helping cloud professionals and IT teams transfer cloud skills from the classroom to the workplace. </div></body></html>
17. Go back to Google Cloud console and note the external IP address of the VM.
18. Open a new tab and enter the url http://EXTERNAL_IP/index.html and you will see a successfully deployed a webpage on the Google Cloud Virtual Machine. Make sure to replace the EXTERNAL_IP with the external IP address of your VM.
Note: You can even run a virtual machine by running a single command in Cloud Shell. For more details, head over to the Google Cloud Official Documentation.
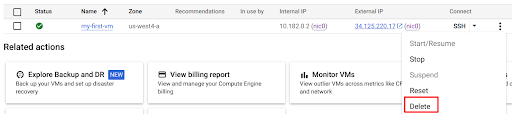
IMPORTANT: Make sure to delete the virtual machine once you are done with the deployment to avoid any additional cost. Just click on the ![]() icon and press delete.
icon and press delete.
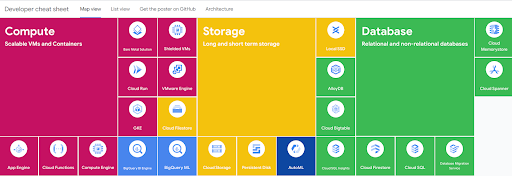
You can reference this Developer Cheat Sheet developed by Google Cloud for a quick recap about the services they provide.
Congratulations! You can now deploy your own VMs in Google Cloud Platform.
Ready to start earning Google Cloud certifications? We’ll give you a coach and help you pass the exam the first time—guaranteed.