The most popular serverless services offered by Google Cloud are App Engine, Cloud Run and Cloud Functions. In this blog, we will learn to deploy applications on two serverless offerings: App Engine and Cloud Run.
What is App Engine?
App Engine is a fully managed (infrastructure managed by Google Cloud) service offered by Google Cloud to deploy monolithic or web applications or multiple services in a single application deployed on Cloud. If any of your machines go down, you don’t have to worry about bringing it up. Google Cloud will do this task for you.
The major advantage of adopting App Engine is that it offers advanced features like Traffic Splitting and Versioning with just a click of a button. As the service is a fully managed service, you can easily scale your service from N to 0 and 0 to N instances.
Get A Personal Google Cloud Coach
In one affordable subscription, you can get 1:1 cloud training with a GCP expert, plus training content and hands-on labs for no additional cost.
See pricingGoogle Cloud offers this service in two formats:
- Standard: In this format, your application can scale down to 0 instances (at the backend every task is performed by instances) thus making your solution cost-efficient. The only problem here is the Limited Runtime environment (Go, Java, PHP, Python, Ruby, and Node.js). You can only deploy an application using a certain set of languages. As you can scale your instances to 0, the scaling is done very rapidly.
- Flexible: This environment type supports more Runtime Environments in addition to the Standard one with Custom Runtimes and .NET runtime. The only advantage or disadvantage is that you should have ATLEAST one instance running thus making the billing go a lot higher. As there should be at least 1 instance running, the scaling takes a little longer than the standard.
Types of Autoscaling in App Engine
- Basic: In this type, instances are created when there is a need and are shut down in case of no load.
- Manual: As the name suggests, the scaling is done manually. You define the instances and it will run the same number of instances despite any workload.
- Automatic: It will dynamically create instances based on parameters such as latencies. It is the default autoscaling type.
NOTE: Basic Autoscaling is not supported in App Engine Flexible.
App Engine Core Components
- Service: These are the collection of functionalities of your application. For example, if you are building an e-commerce website, you will be building a Product Catalogue service, a User Details service, and so on. All these functionalities are created as a Service in App Engine, and by default, these services can talk to each other like microservices.
- Version: This is the major advantage of using App Engine, where you can run multiple versions of a single app, apply Traffic Splitting, Perform A/B Testing based on different sets of users and easily create different environments such as development, test, staging, and production.
- Instance: These are the smallest units of computation in App Engine, which are used under the hood to perform your workloads. These are scaled up and down as per the load (managed by Google Cloud).
How to Deploy an Application on App Engine
- Log in to your Google Cloud Account.
- Search App Engine in the search bar and select it.
- Since this is your first application, you will be prompted to Create Application. Choose the Region closest to you. Make sure to choose the Region wisely as it is Permanent, and you won’t be able to change it later.
- Choose the Language as Python as we will be deploying a Python application and Environment as Standard.
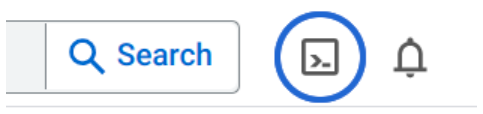
- Click on the Cloud Shell icon present in the top window as we will be performing the rest of the steps there only.
- Use the command mkdir app-engine-application to create a separate directory for the application. Switch to the newly created directory by running the cd app-engine-application command.
- Create a file with the name main.py using nano or vim editor and paste the below code of our sample flask application.
from flask import Flask app = Flask(__name__) @app.route('/', methods=['GET']) def hello(): """Returning a message.""" return 'We’re an IT training company focused on upskilling individuals and teams on cloud platforms and technologies through hyper relevant instruction\n' - You have created a file for our application code, but we need to enter more details like dependencies and runtime.
- Create a file with the name app.yaml using nano or vim editor and paste the below code. This file specifies how URL paths correspond to request handlers and static files, and also contains information about your app's code, such as the runtime and the latest version identifier.
runtime: python37 - Since we are deploying a python application we need to specify all the dependencies in the requirements.txt file.
Flask==2.0.3 - We have successfully defined all the application code. Now deploy the application by running the gcloud app deploy command.

- You will be prompted to enter Y/N, carefully review the details and enter Y.
- The deployment process will take around 1-2 minutes, after the successful operation enter the gcloud app browse command to get the link for your application.
- Copy the link and open in a new tab, you will receive output like the one below.
We're an IT training company focused on upskilling individuals and teams on cloud platforms and technologies through hyper relevant instruction. - In case you receive an error like the below, just click on the link and enable Cloud Build API and redo from step 12.

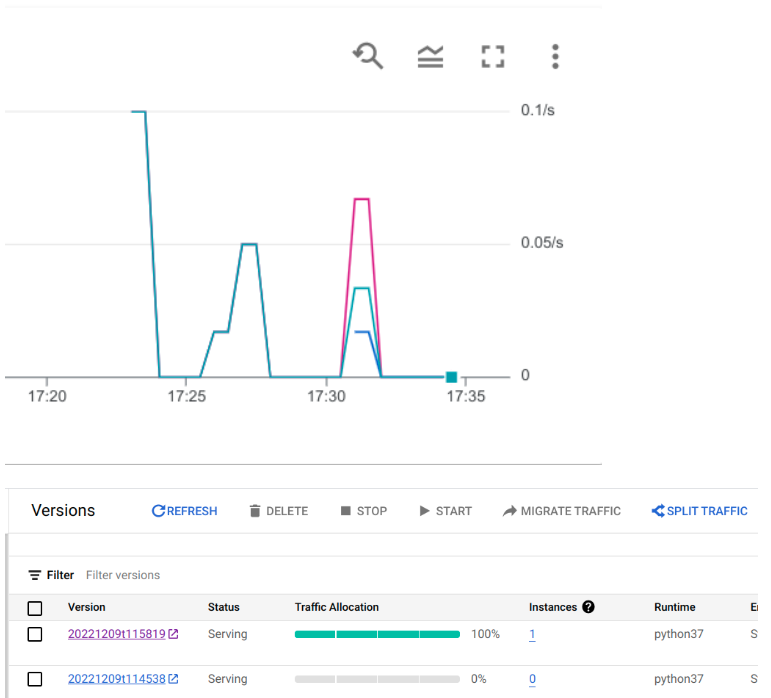
- You can explore more features of App Engine like Split Traffic under the Version section and analysing the incoming requests using the Charts.
What is Cloud Run?
This service is best suited for clients who have shifted from monolithic to microservice architecture or want to deploy an application built using any language, library, or binary and are looking for a managed, serverless solution to manage their stateless workloads. This service is also a good fit for customers who lack an experienced professional team to manage their container infrastructure. The major use cases for Cloud Run are event-driven web applications, APIs, and microservices. One interesting fact about Cloud Run is that it has a built-in internal load balancer to distribute the load evenly across the containers, hence achieving serverless nature.
For deploying an application, you just need to define the URL of the container image, enter the service name, a region, and the max/min instances. Another advantage of using this service is that it provides advanced traffic splitting features accompanied by easy rollback and versioning.
Cloud Run is mostly used for running stateless workloads, though you can make the data persistent by integrating Cloud Run with services like Cloud Spanner or Google Cloud Storage.
In terms of security, you can use Secret Manager to store secrets and Binary Authorization to check for any vulnerability in the container image.
One of the best features of Cloud Run is its pricing. You are billed on the amount of time you used the resources, rounded off to the 100th second. In the free tier, Google Cloud doesn’t charge you for the first 180,000 vCPU-seconds/month, first 360,000 GiB-seconds/month, and 2 million requests/month.
How to Deploy an Application on Cloud Run
- Login to your Google Cloud Account.
- Search Cloud Run in the search bar and select it.
- In the console, you can get the list of services that you deployed on Cloud Run. As of now, you will find it empty.
- Choose the Cloud Shell icon present at the top of the window.

- Here we will be creating a different folder/directory of our code like we did in App Engine. Enter the command mkdir cloud-run-service to create the directory.
- Use the cd cloud-run-service command to switch to the newly created directory.
- For this tutorial, we will be deploying a basic Flask application, so create a file with the name app.py either using the nano or vim editor.
- Use the sample code for the application described below.
from flask import Flask app = Flask(__name__) @app.route('/', methods=['GET']) def hello(): """Returning a message.""" return 'Pass your certification exam! Get the best online training, practice labs and coaching to master cloud computing in one affordable subscription\n' - As Cloud Run is used to deploy containerized applications, we need to create a Dockerfile. You can use nano or vim editor for creating the file, make sure that the file name is Dockerfile.
- Paste the below-mentioned code in the Dockerfile.
FROM python:3.7-alpine # installing dependencies RUN pip install Flask gunicorn # Copying the local code WORKDIR /app COPY . . # Running the service CMD exec gunicorn --bind 0.0.0.0:$PORT --workers 1 --threads 8 --timeout 0 app:app - Now, in order to run this application, we need to create an image from our Dockerfile. To create the image, run the below command, which will use Google Cloud build service to create an image and store it in the Container Registry.
- To create the Image run the below command which will use Google Cloud build service to create an image and store it in the Container Registry.
gcloud builds submit --tag gcr.io/<PROJECT-ID>/cloud-run-image --gcs-log-dir=gs://<PROJECT-ID>_cloudbuild/run - After successful creation make sure to copy the ID of the image.
- You can even go to Container Registry to confirm the creation of the Image, just search Container Registry in the search bar and select it.
- You will find a folder with the name cloud-run-image which will have a list of images that you built.
- Our Image is successfully built, now just deploy the image using the command.
- Copy the below command to deploy the Image and Paste it in the shell.
gcloud run deploy --image=<ID> --platform managed --region us-central1 --allow-unauthenticated cloudrun-service - The deployment will take around 1-2 minutes, after the successful deployment, it will return a link to your service. Copy it and Paste it in a new tab.
- Go back to the Cloud Run page and reload it in order to see the configurations of the service.
- Now we will deploy another version of our same service, for this we need to edit our app.py file using nano or vim editor.
- Make some changes to the file on your own or add a single line to it like the below one.
from flask import Flask app = Flask(__name__) @app.route('/', methods=['GET']) def hello(): """Returning a message.""" return 'Pass your certification exam! Get the best online training, practice labs and coaching to master cloud computing in one affordable subscription. This is version 2 of my Cloud run service.\n' - Dockerfile will be the same as the previous one, we just need to create the Image again, as we have made some changes in our application code.
- For creating the image, run the mentioned command.
gcloud builds submit --tag gcr.io/<PROJECT-ID>/cloud-run-image-v2 --gcs-log-dir=gs://<PROJECT-ID>_cloudbuild/run - After the successful build, Copy the ID of the Image.
- Now we will be deploying the same service with the new Image.
gcloud run deploy --image=<ID> --platform managed --region us-central1 --allow-unauthenticated cloudrun-service - Just reload the same URL and you will receive a different output.
- As of now the new version is serving the traffic 100%, but if we want to split the traffic 30% and 70% between both the versions respectively we can do that very easily, just head over to the Cloud Run service that you created before.
- Choose the Revisions section.
- Click on Manage Traffic and enter the required details.
- You have successfully deployed two versions of a containerised application on Cloud Run and splitted the traffic between them.
NOTE: Make sure to delete the Cloud Run Service, Cloud Storage Buckets, Directories and the Images that you created to avoid incurring any additional cost.
Ready for a better way to learn Google Cloud? Engage a entworkk of expert cloud coaches for 1:1 training, plus access free training content and hands-on labs in one affordable subscription. Learn more about cloud coaching.